Showing posts with label Russians. Show all posts

Friday, 2 January 2015

Painted Soviet Strelkovy Company

The whole company assembled.
I think it was Warfare 2005, or was it 2006? In any event, there has been a set of figures which have sat in various stages of painting on my desk or in boxes for the last decade which are finally done. I finished them on the 30th of December, so they fell into my 2014 painting tally. You can see my handiwork below.


My 15mm stuff is intended for I Ain't Been Shot Mum, another set of excellent rules by TooFatLardies. This means I need to bulk out both the Soviet and Finnish forces available to me with specialists and some armour. I suspect several reviews might be making their way onto the blog in the near future.


For the Finns I am inclined to go with Battlefront's offerings, but with the Soviets I have more choice. I suspect that for armour I might end up getting a veritable smorgasbord of figures from various manufacturers to see what I like and don't like. I am particularly keen on trying the Zvezda 1/100 scale kits that Plastic Soldier Company sell, as well as their own plastic kits. Cost is increasingly a concern for me, and I am prepared to make a compromise between quality and price, provided it is a good balance.

That is all for now, hopefully I shall have more to show soon.

Tuesday, 23 April 2013

Basing 15mm World War II Russians

I've started basing up the Strelkovy Company to fight the Finns in the Jatkosota, or Continuation War. These figures have been painted for some time and have been awaiting completion, and frankly World War II isn't a priority for me. In any event, I did a test model using Polyfilla to build the base up to the metal feet of the miniature followed by Games Workshop's Stirland Mud texture paint and a drybrushing of Steel Legion Drab, and then some flock and stuff for a Autumnal look. Not really happy with the result, which to my mind was flat and just not rich enough. Here is a rather poor photo:


I then did another element using sand, and a base coat of Rhinox Hide followed by a Steel Legion Drab drybrush, and more Autumnal flock. The result is far more to my liking, it looks richer and creates a better blend with the figures on the base:


Once I have built my fabled light box, which might happen on Thursday if I am not in London, then I will post a step-by-step tutorial on how I do my bases with some better photos. In the meantime, please have a look at the photos below and let me know what you think.


The flocking materials I used are Games Workshops ancient green flock, and Hornby Skale Scenics foliage fibre clusters, late Autumn medium and a bag of fluffy yellow flock, also from Hornby. I was inspired by Doctor Faust's Painting Clinic on Youtube when it came to the bases, especially picking out the largely gravel bits in grey to break up the base. I also realised that I really made this harder than it needs to be by painting the figures unbased, and in the future I might just paint the figures in situ like he does. Have a look, I think it is a worth a watch.


 More to come of course.

Carry on.

Saturday, 26 May 2012

Workbench Update, End of May

May is almost over, and the end of the month is a good opportunity to gauge painting progress this month. The Confederate infantry are almost finished, I am still trying to get my standard grey perfected, as the paints I used made the last batch quite light. The good news is that the variance adds to the overall character of the Confederate army which I am consciously trying to model as irregular in opposition to my planned Yankees. I need to order some Fire & Fury sized bases from Warbases to finish them. I also happened upon a few Confederate cavalry whilst during some rummaging which was a nice find, but I am in no hurry to get them painted up quickly given that cavalry was largely falling out of use, but I will need them eventually.

On the Eastern front, the Russians are almost done, the rifle teams are all complete, the officers are done, and the bunker diorama thing is done too. Now there are just a few mortars and a heavy machine gun to go, as well as six would be deserters who were caught lurking in a bits box and were swiftly dragged back to the frontline to be painted. Then the lot needs basing, which I will do following the method from my earlier post. Here is the completed test base for the delectation of the gentle reader. I have opted for a simple mud and flock look with a little autumn thrown in. I picked up Scale Scenics autumn flock yesterday and will mix it in to give the bases a more colourful look to try and bring beautiful Karelia to them.

Meanwhile, in a fantasy realm, far far away, two units of Dwarf warriors are reporting for duty to defend the mountain hold of Karak Vol, or Blue Mountain. These fellows are finely dressed in the livery of their mountain home, which is famed for Lapis Lazuli, the lifeblood of the economy. On the left is the bigger of the two units. I am pleased by the final result of the Army Painter anti-shine and the overall process, which was quick, hassle-free and didn't cut into painting time for more important projects. The next unit to be called up will be Thunderers.

It has been a productive week, though the fine weather has kept me from painting more. In addition to the ACW, Russians and Dwarves I have also been doing little bits and pieces like dusting off my old 15mm DBA armies and refurbishing my 28mm Early Imperial Romans who were quite badly battered. Hopefully I will get an opportunity to write up my first game of Field of Glory which Taff and I played this week and share my thoughts on the rules.


Sunday, 20 May 2012

Update from the Workbench

A rather "muddy" looking base, good result thus far.
It has been a hectic week, but amongst the smoke and general disorder I have managed to get some painting done. The Russians are now all but done, only the mortars and leader figures to go, and the Strelkovy Battalion will be ready for basing. I haven't based any Flames of War minatures before, and given that the figures stand on mighty pedestals that need levelling off, I thought I would follow the nifty tutorial on the Battlefront website that show how to use Polyfilla as a basing material. I got myself a tube of the ready mix quick dry stuff that you can squeeze straight out and use, and here is my first test base. I am going to let this set for a day before trying to paint it, I know the Polyfilla claims to be quickdry, but there is no harm in leaving it for a little longer.

Whilst having a general tidy up, and taking stock of all my lead, I came across a drawer of 15mm ACW Confederates which were almost done, so I started to complete the last 21 Rebs of that set. The American Civil War is amongst my favourite historical periods and I enjoy reading about what was certainly a more complicated conflict than one "about slavery." It certainly helps that there are many films and books set in the period which provide ample inspiration for us wargamers. On Wednesday evening my father, a Civil War fiend, and I watched Gods and Generalsa very long film at around three and a half hours, which covers the story of General 'Stonewall' Jackson and is the prequel to Gettysburg. I had been reading about Jackson's Shenandoah Valley Campaign and I was thinking about starting 15mm ACW anew with forces for both sides. The relatively small sizes of both armies involved in the Valley Campaign, with Confederate forces peaking at around 16,000 at Winchester, and Union forces 11,500 at Cross Keys, make modelling the armies an eminently doable prospect. So for the moment the 21 Rebs are back on the workbench and I am enjoying painting them immensely, the irregular look of the Confederate infantry is a pleasure to paint when one gets tired of painting homogenous bodies of men. I also found a bag of Confederate cavalry which I shall be painting up as well, I am no position to be buying miniatures at the moment, so I will rather paint what I have.

Also on the workbench is the combined dwarven hosts from two Warhammer Skull Pass starter sets which I had bought many years ago. I don't really play Warhammer Fantasy, but given that it is the most popular thing out there, it isn't a bad idea to have an army on hand should the opportunity to play a game arise. With that in mind, as I am not massively invested in the project on a personal level, the painting and modelling of these miniatures is not subject to the usual focus and attention to detail. This is however an opportunity to explore ways in which to get larger bodies painted really quickly and to that end I am going to try and use the dip method. So I bought a tin of Army Painter Strong Tone Quickshade from Warlord Games and a few days later it was here.

Proud Dwarven warriors almost ready to settle some grudges.
Luckily, The Army Painter has a set of tutorial videos on their website that shows a novice "dipper" how it is done. I favoured the "splash" method, by which you paint the varnish on and the results aren't bad at all. These thirteen dwarves took almost no time to paint, I just blocked in the basecoat colours and painted on the shader. With hindsight I wish I had started basing them at the same time as painting them, but that is a lesson for the next set. Once I have a method down I will post a step-by-step for those who might find it useful. I think most will agree that the results are quite good actually considering the lack of effort on my part, the tabletop view of them is quite impressive. I still need to apply the matt varnish to get rid of that "wet" look, but these are table ready as of now by my reckoning.

It is very tempting to use this method for "hoard" armies, like Picts and Celts, but perhaps with a highlight thrown in after the shading. This is something I will definitely consider going forward.

Thursday, 10 May 2012

Painting Flames of War WWII Russians

As promised, here is the process that I use to paint 15mm Russians from the ancient Flames of War Strelkovy Company boxed set. I can't remember where I found it, but the scheme I used was specifically for use with Games Workshop paints. I tend to use the Foundry paint system, but have a few legacy GW colours, which just so happened to fit this scheme. Mystery contributor, wherever you are, I salute you.

Enormous note: Games Workshop have changed their paint system while I have been away and sadly I have run out of some of the colours I needed. I asked some chap in a Games Workshop store if he could get me the new equivalents and he had a handy guide. Sadly, upon buying and using these new paints it appears as though they aren't exactly the same, so there is now some colour variation in the Strelkovy Company. The new colours are in brackets after the old one.

Step one, undercoat and basecoat: I undercoat the figures with watered down black after mounting them on bases with blutac. Then I basecoat the figures with Scorched Brown (Stirland Mud) which acts as a shade tone for the entire model. Furthermore, most colours adhere quite happily to the brown, whereas black isn't so forgiving.

The group of figures I am painting undercoated.
Basecoated.
Step two, skin: Given that the skin is often the "deepest" part of the model I start here. I use Foundry Flesh, the "B" tone, straight onto the brown basecoat, but taking care to leave the recesses dark. I focus on the nose, chin and cheekbones, and on the hands I take care to leave shading between the fingers. Again, leaving the dark brown is key. I used to use a inking technique, but I find on 15mm figures there just isn't enough depth to really make it work.
Step three, tunic and trousers: I use Graveyard Earth (Steel Legion Drab) leaving the folds in the clothing dark brown. It is also nice to pick out collars if they are there as the break up the miniature quite nicely.
Step four, belts and satchels: These are painted Kommando Khaki (Karak Stone). If the figure has a canteen or pot or something metal, I quickly blitz these with Foundry Metal B.
Step five, the rifle: I start by painting the metal parts of the rifle Metal. After this I use Foundry's Spearshaft B for the stock. The rifle sling is touched up with Scorched Brown if necessary. Since I have the Scorched Brown out I paint the bedrolls as well.
Step six, helmet and boots: The final step is to paint the helmet Catachan Green (Waaagh Flesh) and the boots black.
Fin.
I find this painting style produces neat and stark figures which look good on the table, and this is pretty much how I paint all my 15mm figures. I can quite easily get at least ten chaps done per day in this manner. Naturally with simple schemes, like say Numidians, this ratchets up to about twenty a day. I hope, gentle reader, you find this post useful. Comments are as always welcome.

Saturday, 5 May 2012

It's been a while...

I can't remember the last time I was involved with wargaming. I think it may have been 2007 when I borrowed my friend Steve's Vikings for a WAB tournament at Ascot, but I might be misremembering. In any event, it has been a very long time since I put paint to lead, planned a project, or played a game. The wargaming world has changed a lot in some ways in the intervening five years, and in other ways not at all (I was particularly surprised to see how static Games Workshop have been, not that I buy their stuff). When I dipped out of the rat race Warhammer Ancient Battles was riding high, now it looks rudderless and likely to be supplanted by "War & Conquest" or "Clash of Empires." As a largely ancients player this is all new to me, but the change looks good. DBM also seems to have been replaced by Field of Glory which looks beautifully produced and a good change from the grotty white booklets from years gone by. I ordered the rulebooks for FoG Ancients, Renaissance and Napoleonics from Amazon yesterday and will look to be using these with my 15mm ancients. The Renaissance and Napoleonic rules were largely impulse buys. I have an 15mm Austrian 1809 force for Principles of War, and I doubt I will be rebasing, but it is good to know what is out there. Furthermore, I have always wanted to do some Thirty Years War stuff and there seems to be a vibrant FoG Renaissance community which makes it worth collecting.

Perhaps next month I will get around to looking at some ancients rules well suited to single figure based 28mm, perhaps Hail Caesar, War & Conquest and Clash of Empires. Sadly, the Bicester Wargaming Club folded when I went to university in 2006/7 and largely relocated to Brackley, so I don't have a club on hand, but my old wargaming buddies are around, so playing at home is an option. Friend Taff and I used to play DBA, and he assures me he still has his little armies, so at least a few games of DBA, with a view to trying out Hail Caesar and Field of Glory is very much a possibility. 

As for figures, I had a rummage through my stuff, and found most of it damaged, shields broken off, paint chipped, etc. from years of mishandling and bad storage by a clueless family. Still, it can be repaired, so over the next few weeks I will be slowly fixing up my 1st Century A.D. Romans and Vikings. I also found this box amongst my stuff:


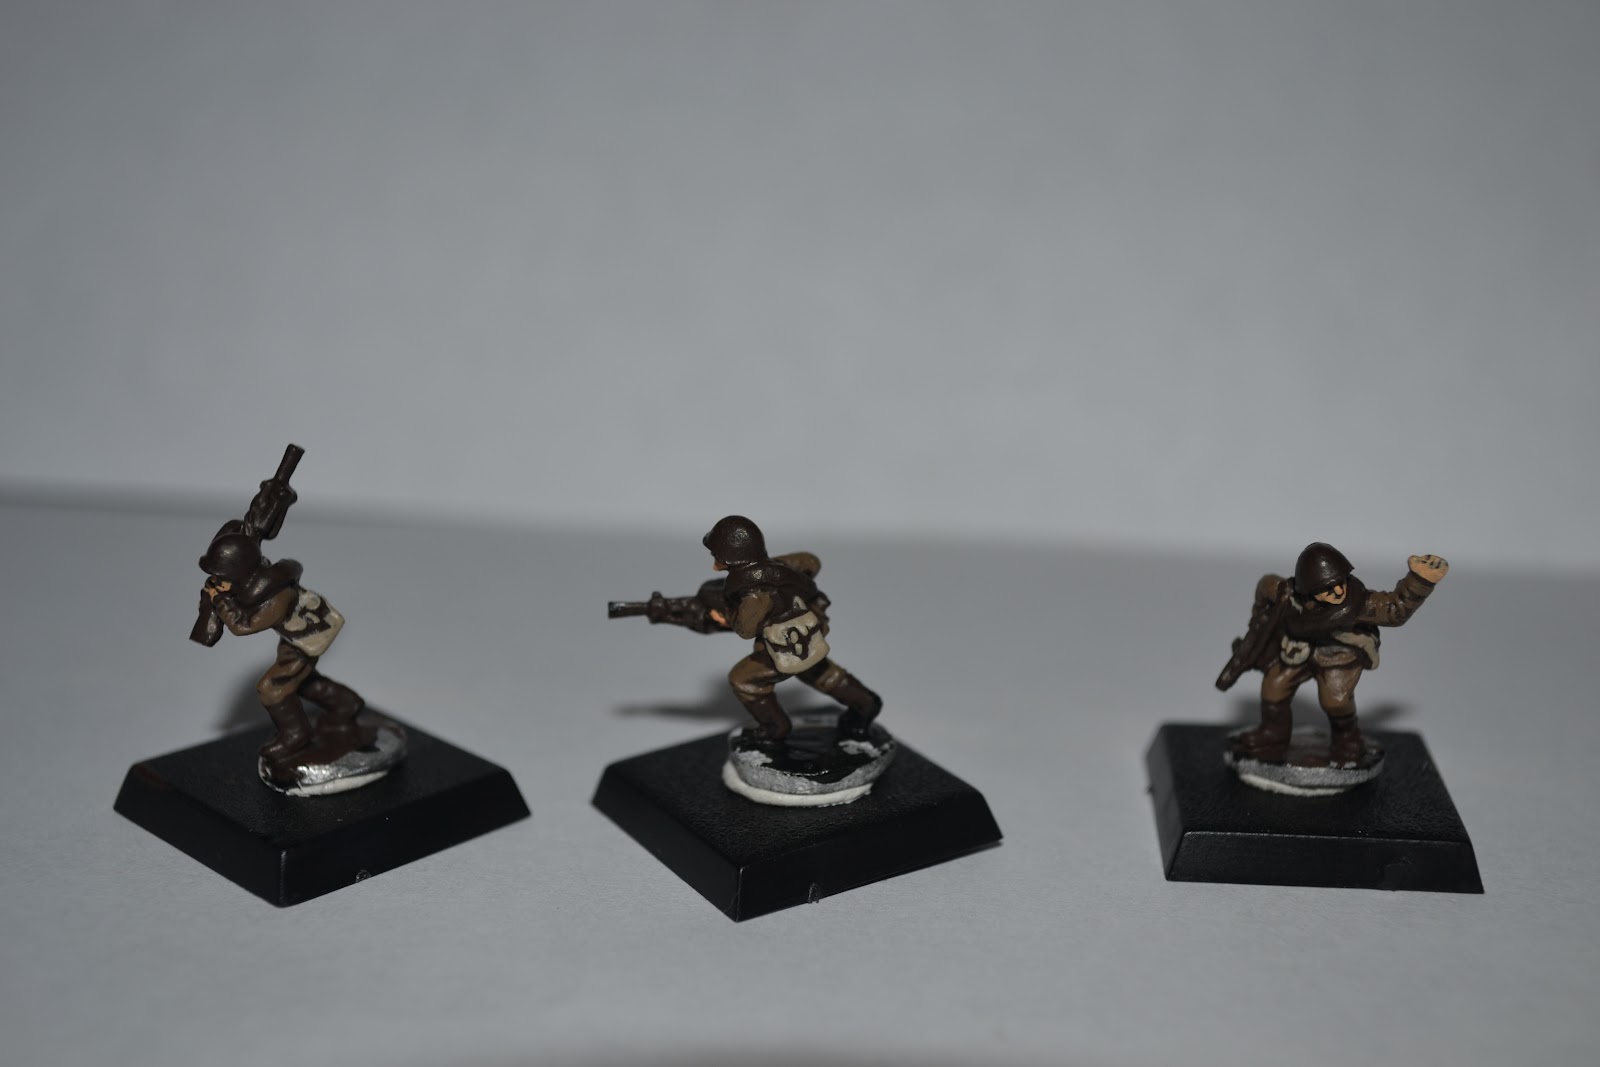
I had a look on the Flames of War website and it doesn't look as though these are in production anymore. I bought them at a show many years ago, I think, along with a blister of Finns to do some some Winter War and Continuation War stuff. On the whole I am not keen on wargaming World War II, especially anything to do with Western Europe, but my love of Finnish history, and the country (having been there a fair few times) inspired me to model the brave resistance to the communist hordes. I started painting the Russians as I found a nifty guide online, since at the time the Finns were super new, so there wasn't much about them on the Flames of War website. I have all the riflemen painted up, and started the SMG chaps yesterday, here are shots to give you an idea of what they look like, the centre figure is a finished rifleman, the figures to either side SMG men who are in progress:

The Russians without too much light.
And with a little flash.
Well, that's all for now. I am off to watch The Avengers at the cinema today and will hopefully finish the nine SMG chaps on my desk tonight. I might post a step-by-step of how I paint them when I get onto painting the heavy machine guns next.