Showing posts with label Painting. Show all posts

Monday, 20 January 2025

2023 Painting Totals

 Thought I would go back and count up the 2023 effort.

  • 6 Austrian Infantry for SYW (Eagle Figures) - 28mm
  • 5 Eldar Dire Avengers (Games Workshop) - 28mm
  • 14 Early War German Infantry for WWII (Crusader and Black Tree Designs) - 28mm
  • 10 Early Imperial Roman Archers (Black Tree Designs) - 28mm
  • 18 ACW Confederate Infantry (Essex) - 15mm
  • 16 Carthaginian Infantry (Essex) - 15mm
  • 8 Libyan Infantry (Essex) - 15mm
  • 24 FPW French Line Infantry (Pendraken) - 10mm
  • 3 FPW French Guns (Pendraken) - 10mm
  • 3 Polish Vehicles WWII (Heroics & Ros) - 6mm

2024 Painting In Review

2025 is now well underway and as I write this I am sat in Thessaloniki, Greece enjoying a few days relaxation before trudging once more into the fray at work.

Although my work often takes me on the road, and away from my beloved toy soldiers, I feel that 2024 was a productive year. And in this post, I hope to summarize my achievements for posterity, but also as a reminder to myself to be less hard on myself. Juggling work, home life, the hobby, and all life's other demands is tricky enough, one shouldn't feel bad about falling short in the optional bits.

It was a year of intense travel again. Australia, Singapore twice, Greece and the UK several times. Also a trip to Brazil. So it is hardly surprising that nothing really got done until May 2024, so let's tally the scores for the year:

  • 12 Seleucid Agema cataphracts (Magister Militum with a ringer from Old Glory) - 28mm
  • 6 Crimean War British Line Infantry (Warlord Games) - 28mm
  • 6 Crimean War British Grenadier Guards (Great War) - 28mm
  • 6 Crimean War Russian Line Infantry (Wargames Foundry) - 28mm 
  • 1 Crimean War Russian Line Gun (Britannia) - 28mm
  • 31 Numidian Infantry (Essex) - 15mm
  • 4 Numidian Cavalry (Essex) - 15mm
  • 22 Greek Infantry (Essex) - 15mm
  • 1 Boer Infantry (Black Tree Design) - 28mm
  • 2 Matabele Infantry (North Star) - 28mm
  • 8 Marian Roman Infantry (Wargames Foundry) - 28mm
  • 30 WSS British Line Infantry (Baccus) - 6mm
  • 16 Norman Infantry (Newline Designs) - 28mm
  • 27 Middle Republican Roman (Old Glory 15's) - 15mm
  • 2 Haystacks

I am not counting rebased figures, of which there were many.

The totals in each scale are therefore as follows:

  • 6mm - 30 Infantry
  • 15mm - 80 Infantry and 4 Cavalry
  •  28mm - 45 Infantry and 12 Cavalry and 1 Artillery Piece with crew
  • Terrain - 2 Haystacks

Not a bad shout for a year hampered by simply not being home enough. 

Saturday, 21 July 2018

Painting Tutorial: Tabletop Workshop Stable 28mm

This is the latest video I have uploaded to YouTube, at the request of a subscriber, showing how I paint my medieval buildings. I hope that viewers might find it helpful.


Friday, 2 March 2018

2017 Painting Tally

Talk about a fail-year...

1 Dreadball Ork Blocker


2-man Polish Light Mortar Team


2-man Polish Sniper Team


1 Genestealer


That's the lot. Nothing to see here, move along citizen.


Friday, 1 July 2016

Heer and Gebirgsjäger Paint Scheme Tests

The painting bureau is currently covered in a whole bunch of Poles and progress is good. I have almost completed the figures required for the Operation Squad game I have planned. The Poles will, however, need an opponent. To that end I have started thinking about the Germans. 

Now, I have never painted German infantry before, so this is new territory for me. That said, of all the belligerent nations of World War II the forces of the Third Reich are well provisioned with painting guides and I have saved myself from the insanity of painting awesome looking, but suicide inducing, German camouflage! 

Luckily the Early War German army has a sharp and simple colour scheme that shouldn't prove too time intensive. The most useful resource in this instance was from the Flames of War website, who have this rather handy pictorial guide:

Copyright Battlefront
I decided to do one Gebirgsjäger trooper (a Black Tree Design figure) and one regular Heer infantryman (from Crusader Miniatures). The Crusader fellow is a tad taller and bulkier than the Black Tree fellow, but they seem happy enough alongside each other. 


The Heer chap is sporting the standard tunic, while the mountaineer is wearing his reversible anorak. This was white on one side and grey on the other. The cool thing about the Gebirgsjäger is the variety of their uniforms. They are quite an "ally" outfit, as the photos below attest:


During the research phase for this project I spent an awful lot of time trawling for photos or drawings of German mountain troops. And I found a few colourised ones. The one above is from the Caucasus, so after Barbarossa was launched.


The photo below is from Austria in 1939. It is clear that these chaps weren't much for regulation kit, and I love the way that colours change almost randomly. 


The drawing below is a helpful painting aid for the wargamer keen to field Gebirgsjäger


Additionally, I used this fine little volume to help me along.


Using all the information I had gathered I had a go at painting both the miniatures and ended up with this:


The photos aren't that great, just some quick snaps on my iPhone, but I think it get across the idea of the uniform. I am quite pleased with the results, although the basing isn't done yet. Once they are complete I will drag out the lightbox and take some better pictures. 

I will cover my method in a separate post later, but in simple terms I simply blocked the colours, then washed with black ink, followed by a highlight. I did a little lighter highlight on the green of the collar, helmet, and gas mask canister. I also realise that I haven't highlight the black yet, but that is just a case of completion really. For the purposes of a test model I am quite happy with the results I have achieved. 

I have decided to stick to do the bases of my Germans similar to those of the Poles, though I think the Gebirgsjäger will likely be a little more rural. As usual, the author is grateful for the opinions of readers.

Sunday, 18 January 2015

Poland 1939: Polish Test Figure Done

I finished my first Polish Infantryman today. The scheme largely consists of browns, greens, and greys of various hue, so I feel that my decision to paint the coloured collar tabs brought some much needed colour to the figure. These collar tabs vary based upon the wearers arm of service. Infantry wore dark blue, with a white zig zag trim. I lightened the blue based upon personal taste. 


Keen eyed observers will notice that I have painted the eyes on this figure, which is something I never bother with. Normally the eyes are shadowed by the helmet, or other headwear, but this chap's helmet is slightly back, so the eyes had to be done.  


The colours I used are as follows, Vallejo Model Color unless otherwise stated. I painted almost everything in a three step highlight, directions below:

  • Clothing: Russian Uniform Green -> Green Brown -> 50/50 White & Green Brown
  • Helmet: Camo Olive Green -> Brown Violet -> Green Grey
  • Webbing: German Field Grey -> Green Grey -> 50/50 White & Green Grey
  • Ankle Puttees: Steel Legion Drab (GW) -> Karak Stone (GW)
  • Ammo Pouches, Entrenching Tool Cover & Back Pack Straps: German Camo Medium Brown -> Flat Earth -> Green Brown
  • Boots: German Camo Medium Brown -> Flat Earth -> 50/50 White & Flat Earth
  • Backpack: English Uniform -> Khaki -> Stone Grey
  • Bedroll: Rhinox Hide (GW) -> German Camo Medium Brown -> Flat Earth
  • Gasmask Container & Mess Tin: Camo Olive Green -> Russian Uniform Green
  • Bayonet Hilt & Entrenching Tool Handle: Foundry Spearshaft triad. 
  • Rifle Body: Rhinox Hide (GW) -> Doombull Brown (GW) -> Skrag Brown (GW)
  • Metal bits: Black -> Charcoal Black B (Foundry) -> Gunmetal Grey
  • Collar Tabs: Foundry Royal Blue triad.


Basing wise, I did the two tone scheme as shown in the last post. I then added some grass and winter grass tufts. I want to add some scale bricks later on, as I think it will add a little more colour to an otherwise brownish-greenish scheme. 


I've avoided using metals to a large extent, since rifle parts are usually dull, except the working parts. This is due to mechanical wear and the cleaning process. So the metallic parts of the rifle are dark grey with a touch of gunmetal in the appropriate places. 

Now all that remains is for me to repeat this a bazillion times. 

Saturday, 17 January 2015

Poland 1939: Die Polen sind hier

Yesterday evening I arrived home from work to find a package waiting for me from Element Games. It contained a boxed set of Polish Infantry made by Warlord Games, which I picked up from Element Games as I was ordering some paints from them anyway, and they offer a small saving over Warlord prices. I made a little video about it for YouTube:


The boxed set contains 24 metal miniatures, which suffered from some pretty intense flashing. Most notably on their helmets and, rather frustratingly, their rifle barrels. Many of the rifle barrels were bent quite severely, and furthermore, a combination of very thin metal and flashing at the end of the rifle barrel meant that clean up was fraught with the danger of losing the end of many of the rifles. In the end, I only lost one, so it isn't the end of the world. Mould lines were minimal, though I have a knack of missing them until they have paint on them, at which point they appear to grow in size, meaning I end up scraping them off only to have to repaint again. Nonetheless, I am confident I got most of the mould lines. 

In terms of detail, I am quite impressed. These are  Paul Hicks style sculpts, and I suspect that he may have sculpted these. They don't have that caricatured look that newer Warlord figures seem to have. As my first purchase of Bolt Action miniatures, I am going to declare myself satisfied. The bulk of the box is made up of rifleman, which is useful since a Polish section was huge, consisting of 17 rifleman, a BAR (Polish made wz 28) gunner, led by a Plutonowy (Corporal). I'll need three of these for a full platoon.

This is the only item from the Polish Bolt Action line that Element Games sell, so I shall be picking up the rest of the Bolt Action Polish range as the project continues. I am still awaiting delivery of some Poles I ordered from Black Tree Design during their generous January sale. 

Today I based and primed the entire boxed set. I am currently working on my test miniature. Both the Flames of War website and Warlord Games have a painting guide as part of their paint set that set out the base colours required, as well as a series of photos and plates. However, since I favour a three colour shade-middle-highlight system I need to figure out the colours to either side of the colours suggested by Warlord or Battlefront. 

I decided to paint the core colours I wasn't familiar with onto a sheet of paper, and then surrounding them with possible choices for shades and highlights. As seen below.


Using the above coupled with the painting guides from Warlord and Flames of War I wrote up one of my patented painting cards. It is more or less complete; as I work on my test miniature I'll complete the card.


Finally, I decided to try a different basing scheme for this collection. Since much of the fighting for the Polish campaign takes place in villages, towns, and finally Lwow, I wanted something a little more urban. I therefore decided to mimic Sidney Roundwood's excellent World War I basing scheme. I read his article on it, and I just had to try it. I haven't got any miniature bricks yet, but I shall try and pick some up soon, so for now I am only doing the two tone colouring on the bases.


I quite like the effect, with a few red bricks it will look really sharp. As you can see the flesh is done, though I still need to finish the eyes. I've also decided to paint my Poles with their collar tabs on, since it adds a little colour. The infantry will have Blue collar tabs, and the officer's hat band will also be blue. 

Friday, 2 January 2015

2014 in Review, some statistics

As is often the case at the end of the year we take stock of all that has happened and try and make sense of it all. This year has been tumultuous to say the least, starting, as it did with a move to Australia that quickly went South, and followed by a swift retreat back to Britain. Since then it has been a case of working hard to reestablish myself, and also a return to my Reserve duties after a near six month absence. Naturally this has had an impact on my miniature painting. Oddly enough my time in Australia was particularly productive, mainly because I was essentially unemployed and found myself with a lot of spare time. The big one for me was the Independent Characters Hobby Progress Challenge which started with zeal and incredibly swift progress before foundering on the rocks of reality back in Britain. So whilst it ultimately failed to produce the result of a 2000 point army, the fact that I made it to July and past the Zone Mortalis phase was a small victory. 

My Zone Mortalis force, 1000 points.
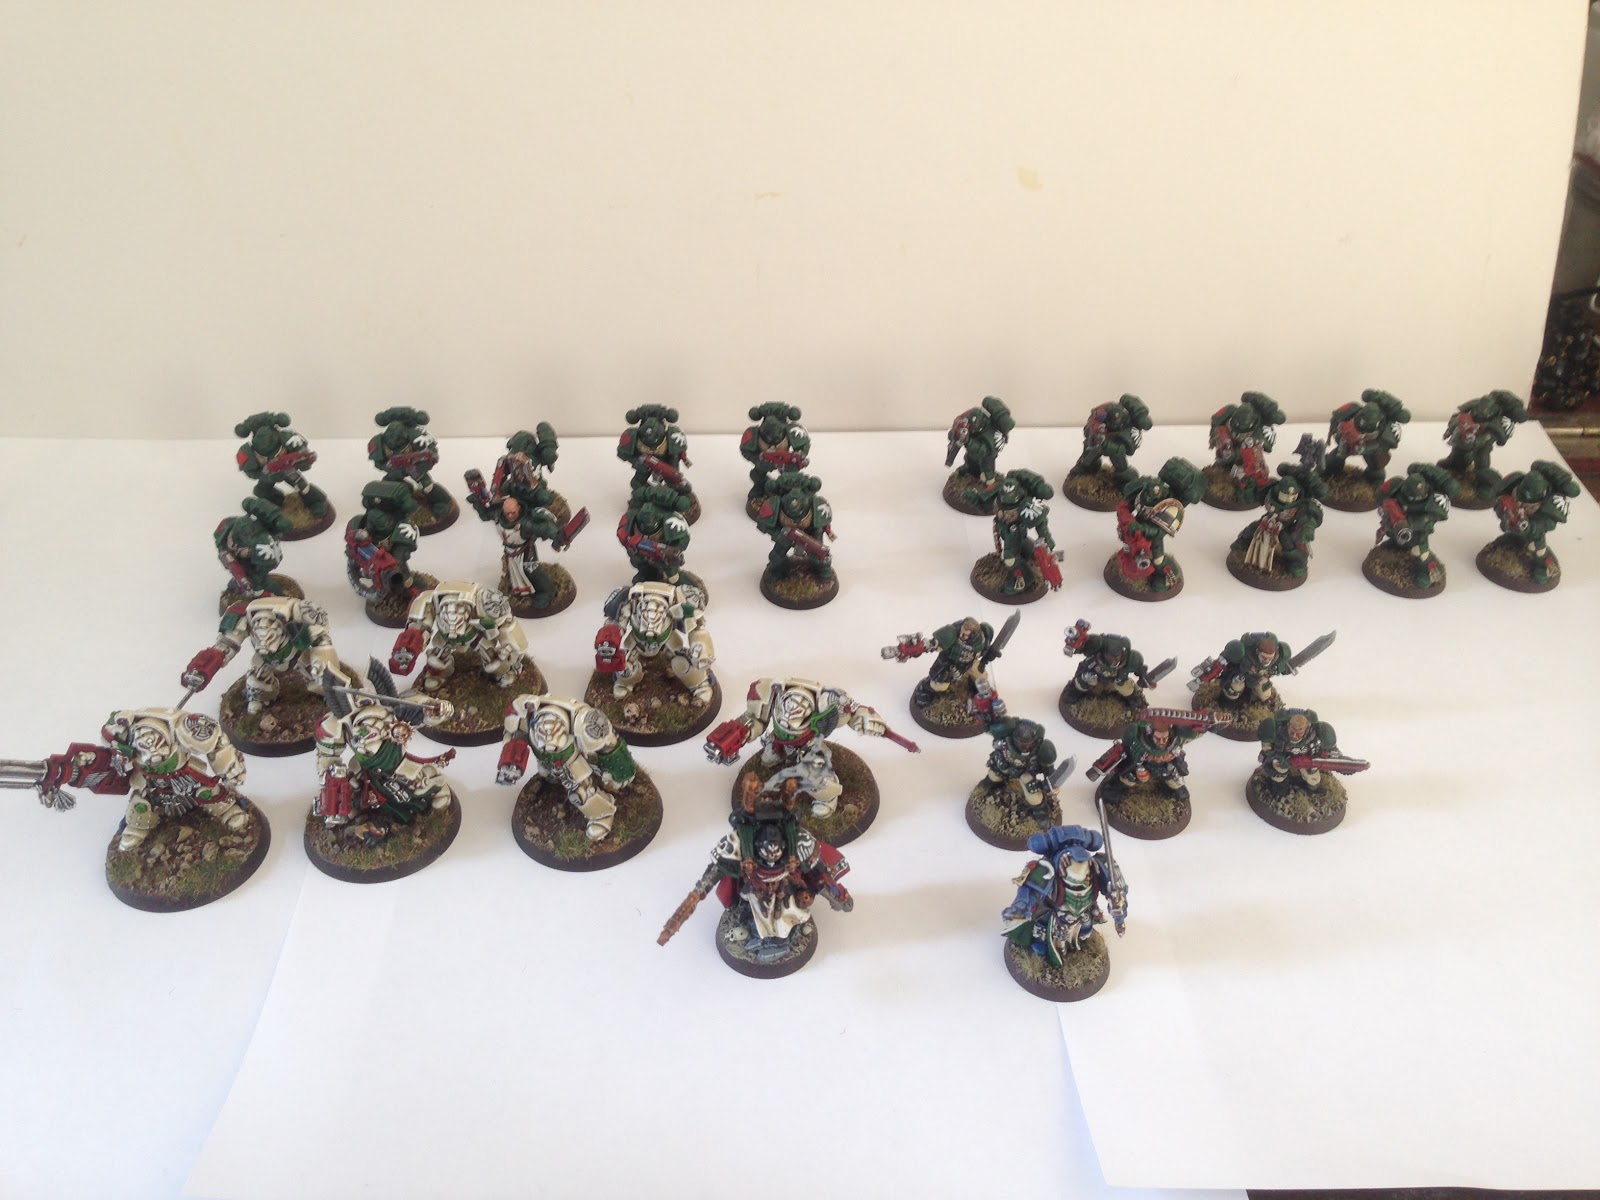
Life always gets in the way, but I am chuffed that at the end of the year I have most of a Dark Angel army to show for it, and have actually had a chance to play. Among the real positives of the year were the Dark Pact gaming weekends in Cardiff, which furnished me with an opportunity to use my nicely painted Dark Angels against Jim's beautifully painted Tyranids. These weekends of gaming and fellowship have only galvanised my desire to paint and also reinvigorated my enjoyment of Warhammer 40,000. It may not be the tight rule set that some people wish it was, but it certainly is a great game for a group of friends.

One of my favourite Ultramarines I painted this year. 
I have also more recently begun to attend Ambrosden Gaming Club with my old wargaming chum Taff, and they have given us a warm welcome. I can only hope that the new year gives us more opportunities to get together and play with toy soldiers. There are rumblings of a 40k campaign, or perhaps even something more esoteric like Necromunda. I am optimistic. As this blog documents, the bulk of my painting efforts have been 40k orientated, but I have been ploughing through other projects. My Viking fix up project is now almost complete, which has left me with a Saga force of decent proportions. Indeed, I had a look in a mystery box over the weekend only to find that I had even more of those lovely Foundry Vikings secreted away awaiting paint. 


In the realm of 15mm, I finished my Soviet Strelkovy Company which took over decade to complete. I'll cover them in a separate post, but suffice to say they are done. Hot on their heels is a Finnish platoon which as been painted in rapid time, and finished just this side of 2015.


I must also add that on the quiet I have also finished my first 15mm American Civil War Confederates. Again this was a project that had its genesis over a decade ago when I was far more into the gaming side of the hobby and which has languished in the queue. These are now done, all based up for Fire & Fury, and ready for action against the Yankees. 


I've also managed to get two more battalions of French troops ready for my 28mm Napoleonic project, bringing me up to three infantry battalions and a handful of individually based miniatures for Sharpe Practice. I have another two battalions of Ligne to add, and then a cannon and some hussars from the Perrys. Reviews and photos to follow. 

Back at the start of the year I purchased the Warmachine starter box, and in the intervening months I have only managed to paint up one Warjack and my Protectorate of Menoth Warcaster Kreoss. Work continues on the other Protectorate bits, as well as pottering along with the Khador parts. Sorscha should be ready for the camera soon. 

High Exemplar Kreoss and his Crusader.
When I reflect on what has been achieved this year it appears to be quite substantial and I must declare myself satisfied. Certainly I could have done more, but on balance, and considering the relative tumult of my life this year, it feels good. 

Figures Completed (painted, based, and varnished)
  • 30k Ultramarines - 8
  • Imperial Guard - 1
  • Orks - 4
  • Dark Angels - 45
  • Chaos - 1
  • Warmachine - 2
  • Vikings - 18
  • French Napoleonic - 53
  • 15mm Soviets - 104
  • 15mm Confederates - 63
Games Played
  • Warhammer 40k: 1 Win, 1 Draw, 4 Losses.
  • Battlefleet Gothic: 1 Loss.
As you can see, gentle reader, not so many games, but plenty more on the horizon. 

Wednesday, 31 December 2014

First Models I Ever Painted

I made a little video about the first miniatures I ever painted. I'd be interested to see others' first efforts.


Tuesday, 2 December 2014

Painting Update

I am currently wrangling with a lighting problem. My trusty hobby lamp's bulb died an untimely death a couple of weeks ago, and despite replacing it with more bulbs, I can't seem to get hold of proper, natural light bulbs. I've had a chat with the chaps at the club, and they have directed me towards something that might work.

The frustrating part is that I had quite a productive weekend, and finished off a fair few bits that were sat upon the painting table. I took photos, but had had to play with them extensively to get the colour to look half true to life.

Here they are:

Two more Ultramarine brothers, this was the only decent photo.
I have completed two more Ultramarines for my 30k army. I still have a fair bit of resin waiting for paint, a lot of which was donated kindly by Mr. T before he absconded to Canada. I am holding back a bit on this front with the promise of Ultramarine specific things next year. But I just can't help but work on these in parallel with whatever else is on the table.


Stacking.

Cover me brother!

Two veterans for my Dark Angel Command Squad. I decided to go for a close combat based unit, and as such power weapons abound. I particularly enjoyed building these fellows. The Apothecary is now almost done, the white being an absolute pain, and then all I have to do is the Champion and the Standard Bearer. I also bought the Dark Vengeance expansion set for Dark Angels, a video review of which is now on YouTube. 


At the moment I am looking to bulk out the Dark Angels with a flyer and some vehicles, so a Vindicator should be appearing soon. Additionally, I am probably going to mount my Command Squad in a Razorback for some protection and a little fire support.

I've also begun working on my Warmachine stuff again. Below are my first Warjack (Crusader?) and High Exemplar Kreoss, who has featured on the blog before. I repainted his Menoth crosses to match the 'Jack, and will probably repaint the metal parts of the 'Jack when I get an opportunity as the bronze isn't quite what I want. A club member has a Minotaur Space Marine army, and his bronze is fantastic. He has kindly shared his recipe with me, which I shall shamelessly steal and use for my own devious ends. 


I've made contact with the Warmachine/Hordes community near my workplace of Milton Keynes, and a kind forum member on the Privateer Press forums (Rangerbob) has offered to teach me how to play. So a warm welcome indeed, and impetus to paint my figures. 


Finally, more Vikings. These were painted an age ago, and are undergoing a bit of upkeep following years of neglect. I have a few more on the desk, and then I need to count how many of these hairy marauders I actually have. I think that Saga might now be within reach.

As a final note, I have actually finished my Soviet Strelkovy Company. I tried taking photos, but the lighting was miserably bad, and at 15mm scale, the figures looked awful. Once I sort out my lighting I will post some pictures. 

Monday, 14 April 2014

How To Paint Lots of Miniatures, Quickly

Nothing looks more impressive than painted troops manoeuvring across a tabletop decorated judiciously with terrain. Blue coated Frenchmen facing off against white coated Austrians, with green trees, a shallow blue brook, and a few stone hovels dotted about, makes a game of toy soldiers come alive with colour and really fires the imagination. Conversely, nothing deflates the imagination quite as much as a bare table with little or no terrain, and worst of all, bare plastic cavorting atop it. Certainly, when we all begin we start like this, our keenness overcomes aesthetic qualms as we simply want to play, and no one would dream of curbing our enthusiasm. However, weeks turn into months, and while the horde of grey plastic continues to grow, there might be little evidence of colour creep, and, while highly abstract woods in the form of an irregular piece of white paper with "woods" written on it might have been charming when we first started, no one can doubt that it is starting to all look a little bit lame.

Some people are into wargaming for the games, others for the modelling, but like it or not, we must indulge in both in order to qualify as wargamers. Even if your idea of modelling is to pay somebody to paint your figures for you, you are still getting it painted. I would suspect that one of the main reasons for people leaving the hobby is their apparent inability to get things painted, and thumbing through an issue of Wargames Illustrated or White Dwarf only further compounds the problem as the bar is set monumentally high. The hobbyist paints perhaps a handful of marines, and then comparing it to the beauty seen in the magazines declares, "mine looks nothing like that!" And so frustration. I used to be of a similar demeanour, always berating my own painting skills in the face of a 'Eavy Metal paint job, until I took my first painted army to a Warhammer tournament. It was an Empire army and my palette consisted of whites, blue, red and oranges. There was nothing particularly fancy about it, I did no highlighting, just glazes and washes, and yet strangers were commenting how great it all looked. I was baffled.

It was around this time that I realised that no one actually picks up your models and appraises them under a magnifying glass. They really don't. It gets said elsewhere, in many hobby books, but it does demand repetition, your models are going to be viewed from about a metre away, most of the time. Also, they will mostly be viewed from the top down. By all means, lavish attention on that character stand or model, these are the models that get the attention, but the nameless spearmen, third from left in the second rank of that unit of Viking hirdmen is simply just not interesting enough to be noticed. So let's just get things painted! Admittedly it is a little harder with loose formation figures, like say Space Marines, since we feel that they are more to be appraised from various angles, whereas ranked troops are somewhat hidden from view. However, realistically nobody cares much for a tactical marine, so he just needs to be done. 

Method is Everything

I find that if I approach the painting of a unit in a methodical fashion it tends to get done quickly. I've seen some folks lay out a block of forty troops and paint them up one colour at a time. I must admit I prefer smaller chunks, although I can knock out 24 Napoleonic troops in almost no time largely because the poses and uniforms are so repetitive. 

These Old Guard Grenadiers painted up in no time. 
With the Hobby Progress Challenge this year I have been able to paint up a ten man Space Marine squad in two weekends, with no time spent on them during the week. And this hasn't been a case of spending my whole day at the painting table, but doing smatterings here and there. As you can see by the image below, the results are pleasing and means that in the space of three months, I have painted up three troops choices for my Dark Angels, which means I have the functional "spine" of my army done.


So how do I get this done? Well, firstly I get the ambience right, I've discussed this in a previous blog post. The next thing is to break the process down into manageable parts. These consist broadly of the following steps:

  1. Undercoating: I spray undercoat my figures on the sprue if they are plastics. And I almost always use grey, Army Painter do a good grey. I like grey because it is neutral and all colours adhere to it without the need for many coats. If I am painting miniatures with lots of white, I might use a white undercoat, but grey usually does the trick.
  2. Assembly: I hate this stage, I really do. In my opinion line troops don't need to have customisable arms legs and everything else. That said, it needs to be done, so I just get on with it. I always try and assemble with a view to how I am going to paint the figure. In the case of a space marine I will assemble the whole figure except for the shoulder pads. I know some people like to leave them in pieces and assemble after painting, but as a general rule, if you can't reach it with a paint brush you are not likely to see it. 
  3. Basing: Okay, here is the part where many people laugh at me, but yes, I do the bases before I paint the figures. I like to drybrush my bases, and it can be a little bit messy, the last thing you want is to hit your careful highlights with sloppy drybrushing. I might not flock the base at this point given that sometimes the base gets a touch of the highlight colours which can be cleaned later. 
  4. Basecoats: This consists of applying block colours to the miniatures. Our base colours, once this stage is done the model looks basically complete, if a little flat. 
  5. Washes: I hit almost every surface with an ink wash, this draws out the creases and gives the miniature some depth. With my Napoleonics, I apply quickshade dip at this stage. I know some people view it as cheating, but it really isn't any different from using inks. 
  6. Details: This is where most of the time gets spent, essentially finishing every model individually. At this stage I apply my highlights. I only paint one figure at a time at this stage, applying highlights in various areas continually so that it dries as I paint the next area so that I can return to it. 
That is it. Each step can be as simple or elaborate as you please, but speed is essential. What I tend to find is that up until step 5 everything gets done on a production line as those are the parts of the method suited to it. Once I reach my final step I essentially finish each model individually. If you follow this method, you will get results. I have spent years discovering this for myself. I read all the articles in magazines and on the internet, but splitting my painting process into a group/individual phase just made it all come together for me. 

What I hope to do soon is post an article on a specific example of a unit that I am painting, so that you can see the method in action step by step. However, I suspect this might only happen once I am back in the UK in May, so there will be a delay in all likelihood. However, this article has laid the foundation for our method and the reasoning behind it so that the step by step tutorials will make sense. 

Friday, 17 August 2012

Viking Hirdmen


I have been hosting a friend from New Zealand for the past week, and as a result haven't got much painting done. However, I did manage to finish these brave Norse Hirdmen to rally around their Jarl's banner. Again, these are Foundry figures, so quite "heroic" and on the large side. These fellows are individually based and will be used for both Saga and unit based games.


Apologies for the grotty looking movement tray, it has taken a battering over the years. I am hoping to finish my first battalion of Old Guard Grenadiers this weekend, and some more Vikings. However, if the weather is fine I might actually go outside instead...

Saturday, 4 August 2012

Vikings and Grenadiers, better pictures

I woke up to glorious sunshine this morning, so I took the opportunity to take pictures of the completed figures again. Here they are in natural light, which I think does them far more justice.


Friday, 3 August 2012

Some pictures: Vikings and Grenadiers


I managed to finish basing five more vikings of the rather heroic persuasion, as well as my first complete base of French Old Guard Grenadiers. Apologies for the poor quality of the pictures, I am trying to arrange for a better quality lamp for lighting since the changeable weather makes photography outside impossible sometimes. Initially I had tried to save time on the French by simply gluing sand to the base and washing it with brown ink to bind it and shade it, but there was a distinct lack of definition and it looked lame. Instead I opted for my standard basing method using cheap acrylic paint I buy in 250ml pots. First dark brown, then a drybrushing of yellowish brown and finally a drybrush highlight of bone. This is followed by some static grass to finish it off.


I am rather chuffed with the way that these grenadiers turned out, they look rough and ready and overall look rather worn. I have the weekend off, so I am going to try and get a unit of Dwarf Miners done, in addition to finishing off two more companies of grenadiers.

Wednesday, 11 July 2012

Pictures: Dark Age Village Folk

I finally found an opportunity to post a few pictures of my Dark Age village folk. These are Foundry figures from their Viking range, and by the style I would guess Copplestone sculpts. They are an absolute pleasure to paint and make a nice change from the usual armed bods. Enjoy...

Some rascally kids.

I really enjoyed painting the two women in this picture.

The middle figure is Brunnhild Ravenhair, the chieftain's daughter. She will make a good target for a woman snatching scenario. The rightmost is a hedgewitch character, who could be given some "magic" powers for a scenario to make things interesting.
 The really good thing about most of these figures is their wide range of usability. Although they are "Viking" folk they could easily stand in for most Dark Age or early Medieval civilians. I am a big fan of versatile miniatures that are at home in many different armies, places, or periods. I find that the Dark Age period is particularly good for reusability as Northern Europeans seem pretty generic in dress. Anyway, that is all for now. Hopefully I will get a chance to upload some pictures of my Romans in more detail.